

Installing and configuring a digital display media player is a pivotal step in leveraging digital signage to enhance your business's communication, marketing, and customer engagement strategies. This guide walks you through the essential steps to get your digital display up and running effectively.
Step 1: Choosing the Optimal Location for Your Digital Display
Before installation, determine the most strategic location for your digital display. Consider high-traffic areas where your target audience is most likely to engage with the content. The location should be easily visible, away from direct sunlight to prevent glare, and near a power source for convenience.
Step 2: Mounting the Digital Display
Safety First: Ensure that you have the correct mounting tools and brackets for your specific digital display model. Follow the manufacturer’s guidelines to securely mount the display. If necessary, hire a professional to ensure it's installed safely and securely, especially if the display is large or needs to be mounted at a significant height.
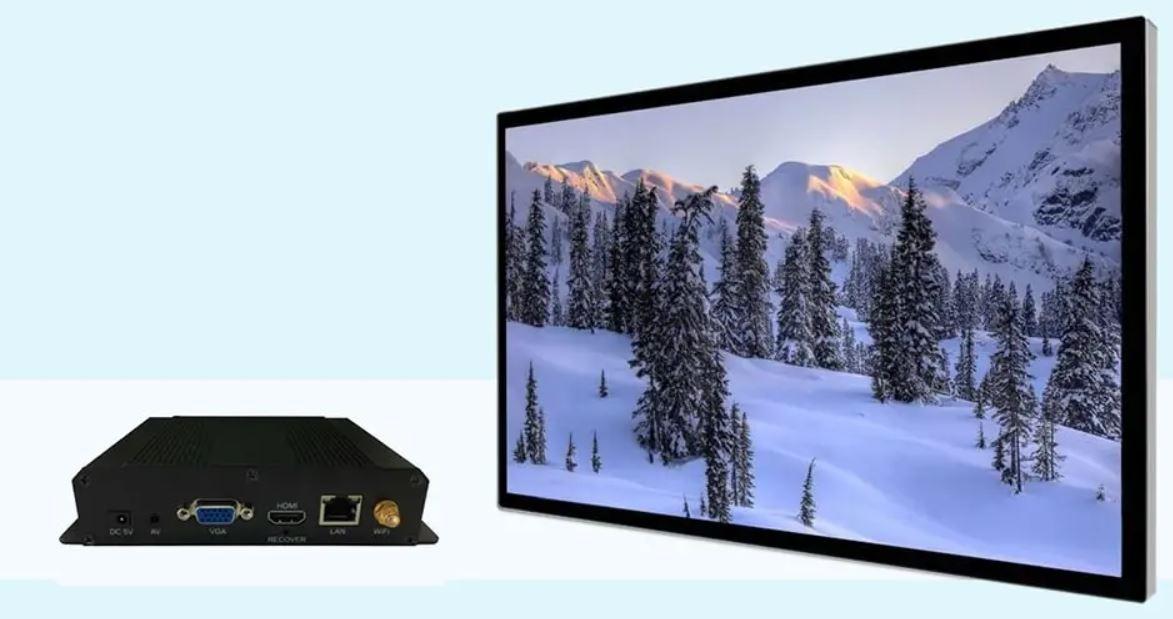
Step 3: Connecting the Digital Display Media Player
After mounting the display, connect the digital display media player. This involves:
-
Powering the Device: Connect the media player to a power source using the provided power adapter.
-
Connecting to the Display: Use an HDMI cable (or any other cable compatible with your display and player) to connect the media player to the digital display.
-
Internet Connectivity: Connect the media player to the internet via Wi-Fi or Ethernet cable, depending on your model’s capabilities. An internet connection is crucial for content management and updates.
Step 4: Configuring the Digital Display Media Player
Once connected, power on the media player and display. You will need to configure the media player, which typically involves:
-
Setting Up the Internet Connection: Follow the on-screen instructions to connect to your Wi-Fi network or verify the Ethernet connection.
-
Installing Software Updates: If prompted, install any available software updates for your media player. Keeping the software up to date ensures optimal performance and security.
-
Logging into Your Content Management System (CMS): Access the CMS you will use to manage and schedule your digital signage content. This might require you to enter a code or log in with credentials provided by your digital signage software provider.
Step 5: Uploading and Managing Content
With the media player connected and configured, it's time to start managing your content:
-
Uploading Content: Use the CMS to upload digital content files, including images, videos, and interactive content.
-
Creating Playlists: Organize your content into playlists that will run on your digital display. Consider the time of day, audience, and location when scheduling content.
-
Scheduling Content: Set specific times and dates for your content to display. Many CMS platforms allow you to manage multiple displays and tailor content to different audiences simultaneously.
Step 6: Testing Your Digital Display
Before going live, thoroughly test the digital display to ensure everything is working correctly. Check the clarity and orientation of the content, the timing of the playlists, and the responsiveness of interactive elements (if applicable).
Step 7: Ongoing Maintenance and Updates
Regularly update your content to keep it fresh and engaging. Monitor the performance of your digital display and media player, scheduling regular maintenance checks to ensure longevity and reliability. Keep the software updated and stay informed about new features or best practices in digital signage content management.
Installing and configuring the best digital signage player is a straightforward process that can significantly impact your business’s ability to communicate effectively with your audience. By following these steps, you can ensure your digital signage strategy is both impactful and efficient.